How to Safely Change a Flat Tyre in Nairobi (Without Causing Drama)
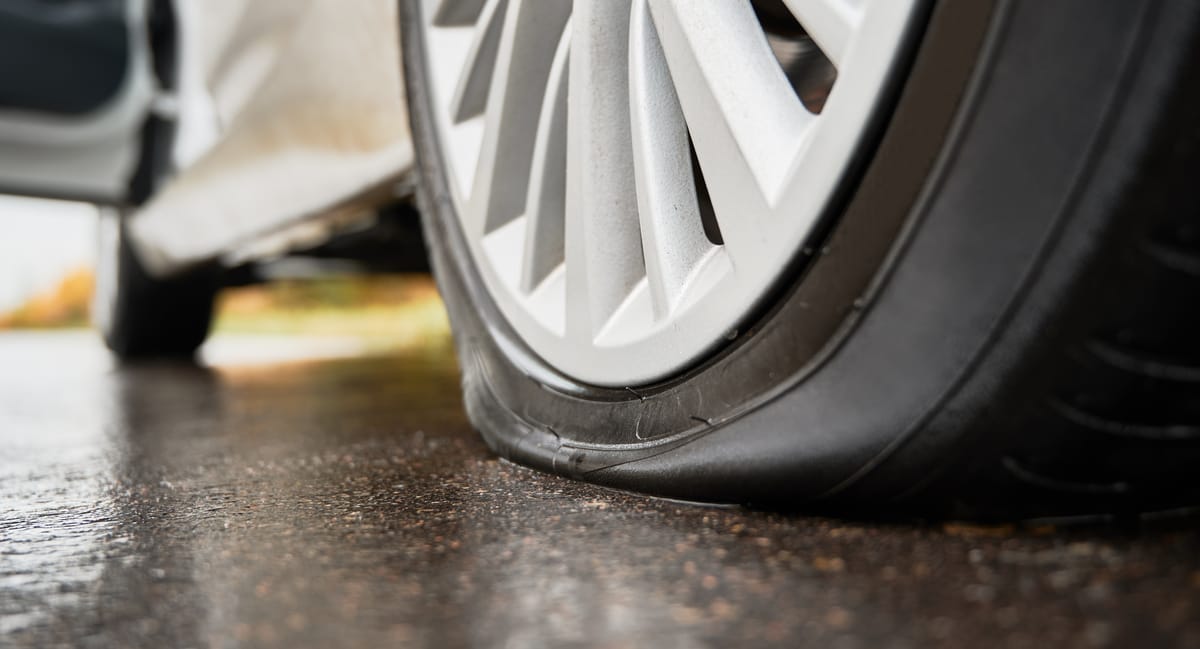
You know that sinking feeling when you’re driving along Thika Road, playlist on point and the suddenly, thud thud thud? Yes, you’ve got a flat. And no, praying won’t stop your car from wobbling like a wheelbarrow. Neither is pretending it will fix itself.
Every Nairobi driver needs to know how to safely change a car tyre. Why? Because waiting for rescue at 10 pm on Mombasa Road is how horror stories start. Also, calling your mechanic every time means spending more than your daily petrol budget.
Here’s your solution to easily and safely change your car tyre should you ever find yourself in that tricky situation.
What You Need Beforehand
Changing a tyre is not about vibes and YouTube alone. You’ll need the right gear:
- Spare wheel: Confirm it’s inflated before you need it. Don’t wait for fate to embarrass you.
- Car jack: Usually included with your car, but check it’s working.
- Wheel spanner: To loosen and tighten the nuts.
- Reflective warning triangle: So kanjo or NTSA won’t ask unnecessary questions, and, for your safety.
- Reflective vest and gloves: For safety and cleaner hands.
- Wheel chocks or stones: To stop the car from rolling away while you work.
Step 1: Find a Safe Spot
The first rule: safety, not vibes.
- Pull over to a safe, flat area. Don’t stop in the middle of the road like a matatu crew member waiting for passengers.
- Switch on hazard lights immediately.
- Place your warning triangle about 50 metres behind the car to alert other drivers.
Remember, Nairobi traffic has no patience. Make sure you’re visible, or you’ll end up trending on X (Twitter) for all the wrong reasons.
Step 2: Secure the Car
Before you start playing mechanic:
- Engage the handbrake firmly.
- Put the car in first gear (manual) or park (P) if automatic.
- Place wheel chocks (or stones) behind and in front of the tyre opposite the flat. Example: if your front right tyre is flat, chock the rear left.
This prevents your car from rolling away like a mkokoteni in a downhill.
Step 3: Loosen the Nuts
Now it’s time to flex those muscles.
- Use the wheel spanner to turn the nuts anti-clockwise.
- Do not remove them fully yet, just loosen them enough while the tyre is still on the ground.
If the nut is stubborn (and trust me, some nuts behave like Nairobi landlords), you can:
- Use your foot carefully to press the spanner down.
- Avoid jumping on it, you might slip and hurt yourself.
Step 4: Position the Jack and Lift the Car
This is where many people go wrong.
- Check your owner’s manual or quickly download one from the manufacturer’s page for the correct jacking point (usually reinforced metal under the car’s frame).
- Place the jack securely, never on soft soil or slanted ground.
- Start raising the car until the flat tyre is a few centimetres off the ground.
👉🏾 Safety hack: Never put your hands, legs, or head under the car while it’s jacked up. A jack is for lifting, not babysitting.
Step 5: Remove the Flat Tyre
Now you can finish the job.
- Remove the loosened nuts fully and put them somewhere safe, not on the road where they’ll roll into oblivion.
- Pull the flat tyre straight out towards you.
If it’s stuck due to rust or dirt, gently kick the side of the tyre with your foot. (Emphasis on gently, don’t break your toe trying to prove strength.)
Step 6: Mount the Spare Tyre
- Line up the spare tyre with the bolts.
- Push it onto the hub until it’s snug.
- Screw the nuts back in by hand first to avoid cross-threading.
Step 7: Lower and Tighten
- Slowly lower the car using the jack until the tyre touches the ground, but not fully loaded with weight.
- Use the spanner to tighten the nuts in a star pattern (tighten one, then the one opposite, and so on). This ensures the tyre sits evenly.
- Lower the car completely and remove the jack.
- Give each nut a final firm tightening.
Remember, it’s “firm,” not “break the spanner.”
Step 8: Pack Up and Check
- Pack away the jack, flat tyre, spanner, and warning triangle.
- If it’s a temporary “donut” spare tyre, remember: don’t drive faster than 80 km/h, and replace it with a proper tyre as soon as possible.
👉🏾 Extra tip: Drive for about 1–2 km, then stop and re-check that the nuts are still tight. Tyres, like Nairobi tenants, sometimes need “second confirmation.”
What NOT to Do When Changing a Tyre
- Don’t stop on blind corners or on a slope unless absolutely necessary.
- Don’t let kids or passengers stand near the car, Nairobi drivers can be unpredictable.
- Don’t use makeshift tools like pliers or hammers, that’s how you damage parts and end up paying double.
- Don’t ignore the flat tyre, driving on it “just to get home” can destroy the rim.
Peach Cars Safety Reminder
At Peach Cars, we don’t just sell you a car and leave you stranded. Every used car we sell at Peach:
- Passes a 288-point inspection.
- Can be financed through our partner banks, meaning you focus on the road, not debt stress.
Changing a flat tyre is a basic skill every Nairobi driver should master. But driving a car that’s been thoroughly inspected and deemed worthy of a buyer like you? That’s peace of mind you can’t put a price on.
Be Your Own Rescue Team
Getting a flat tyre in Nairobi isn’t a matter of if, it’s when. Between potholes, random nails, and our “creative” roads, it’s bound to happen. But with the right knowledge, tools, and confidence, you’ll handle it like a pro.
So next time your tyre gives up, don’t panic. Pull over safely, follow these steps, and change it like the boss you are. Your hustle won’t wait, and neither should you.
And if that car you own now is giving you more tyre drama than necessary, maybe it’s time for an upgrade. Browse our full range of quality used cars on Peach, inspected, trusted, and ready to keep you moving.